¶ Quick Interactions guide
This guide is here to help you quickly get to the fun with interactions.
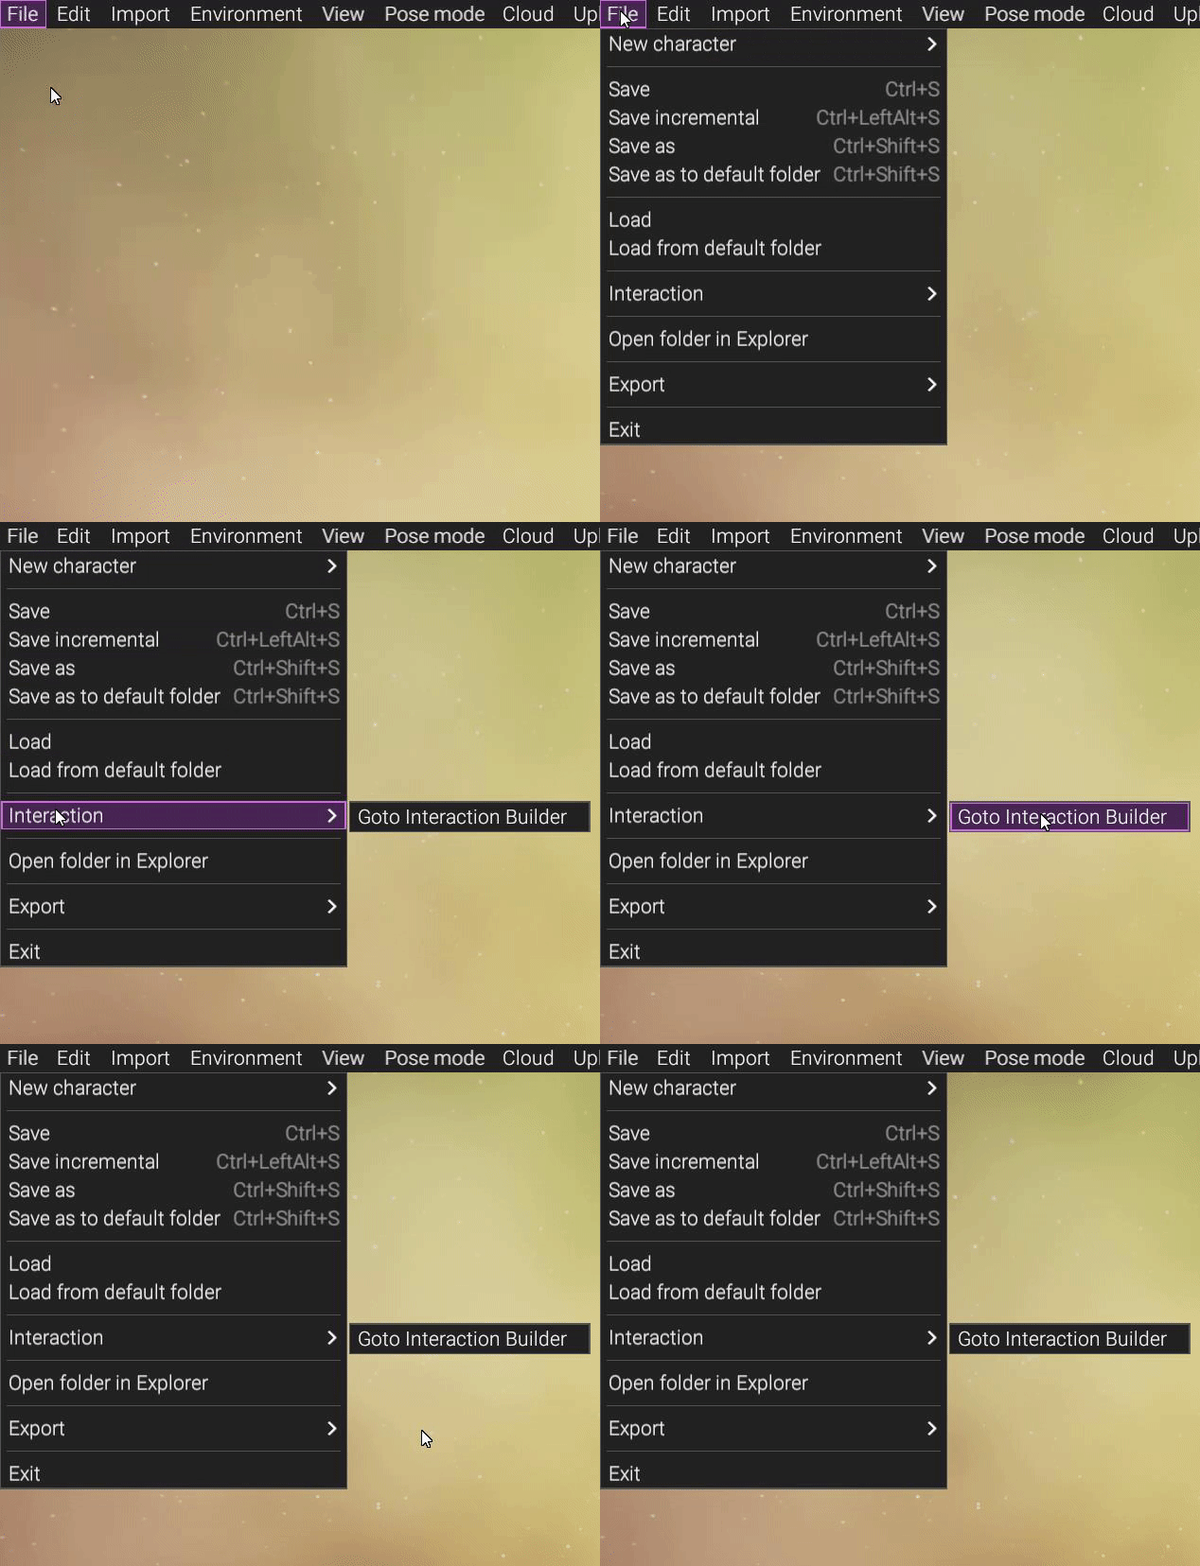
To quickly go into interactions from Character Creation, go to File > Interactions > Goto Interactions Builder
¶ 1. Export your character for Interaction
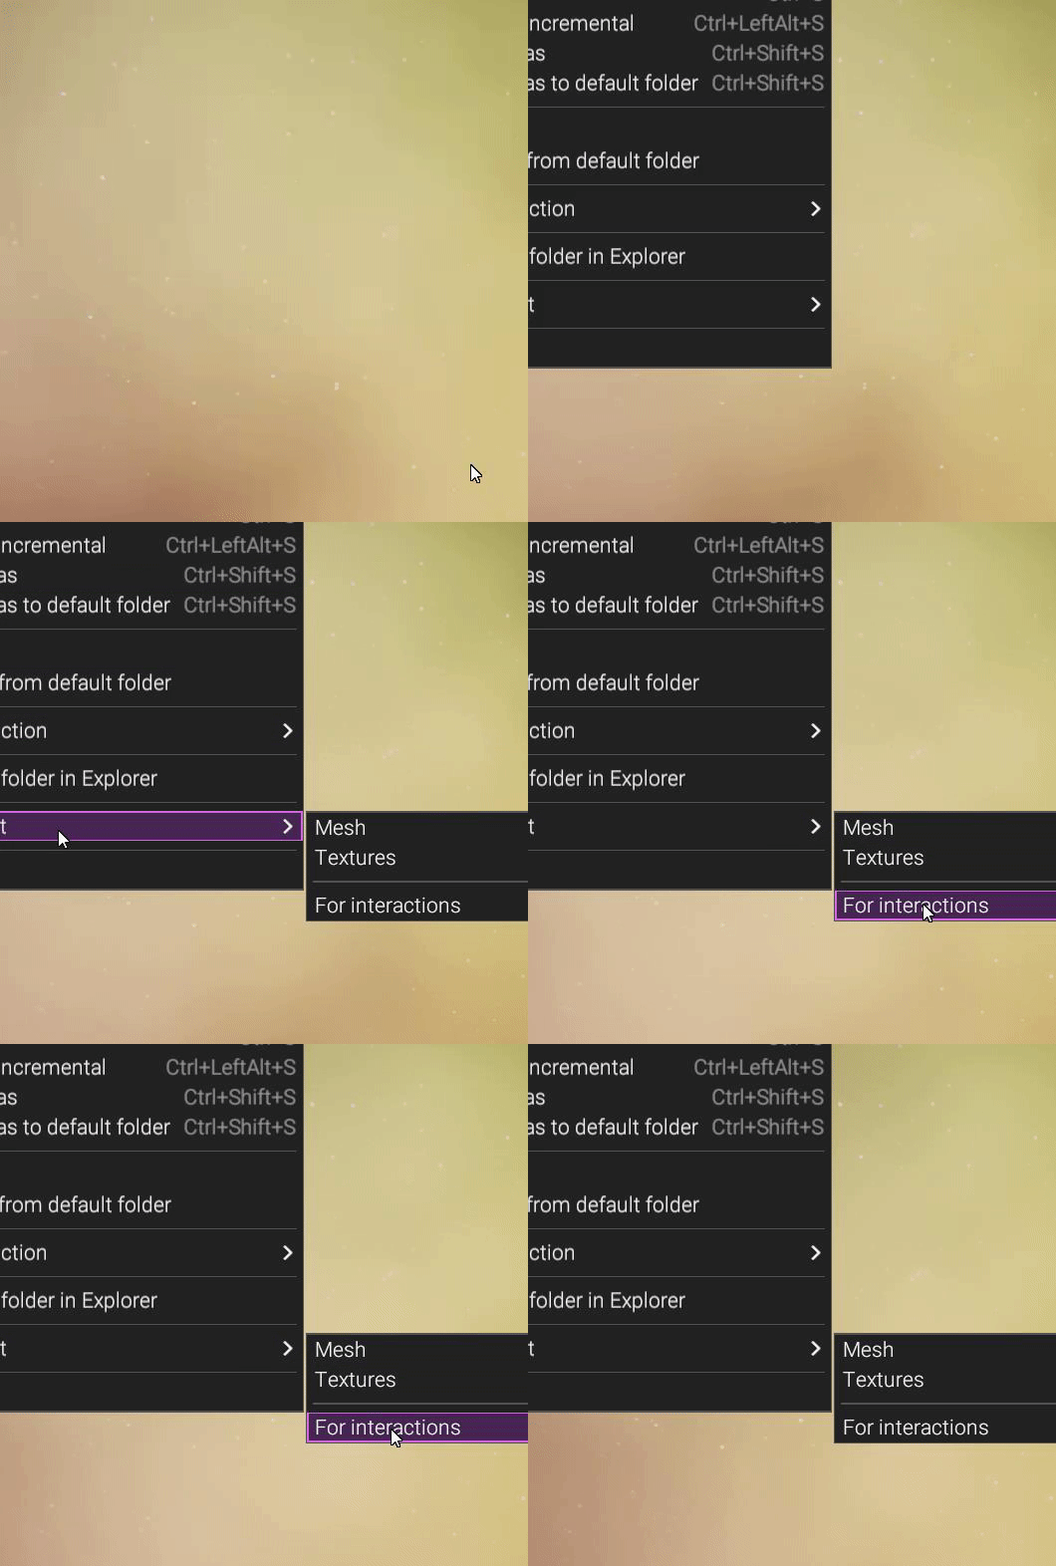
To make a character be used for Interactions go to File > Export > For Interactions
A fairly short-ish loading will happen. Let it run.
Once done, Save the character somewhere you know will find it.
¶ 2. Map Selecting and Adding a character
Select a desired map by selecting a Scene in the Outliner, and click on the Map box and select a new map.
The default map is a great place to start with testing your character for behaving physics, limbs etc. But otherwise, go to the Downtown alley map!

Add a character with Add > Character
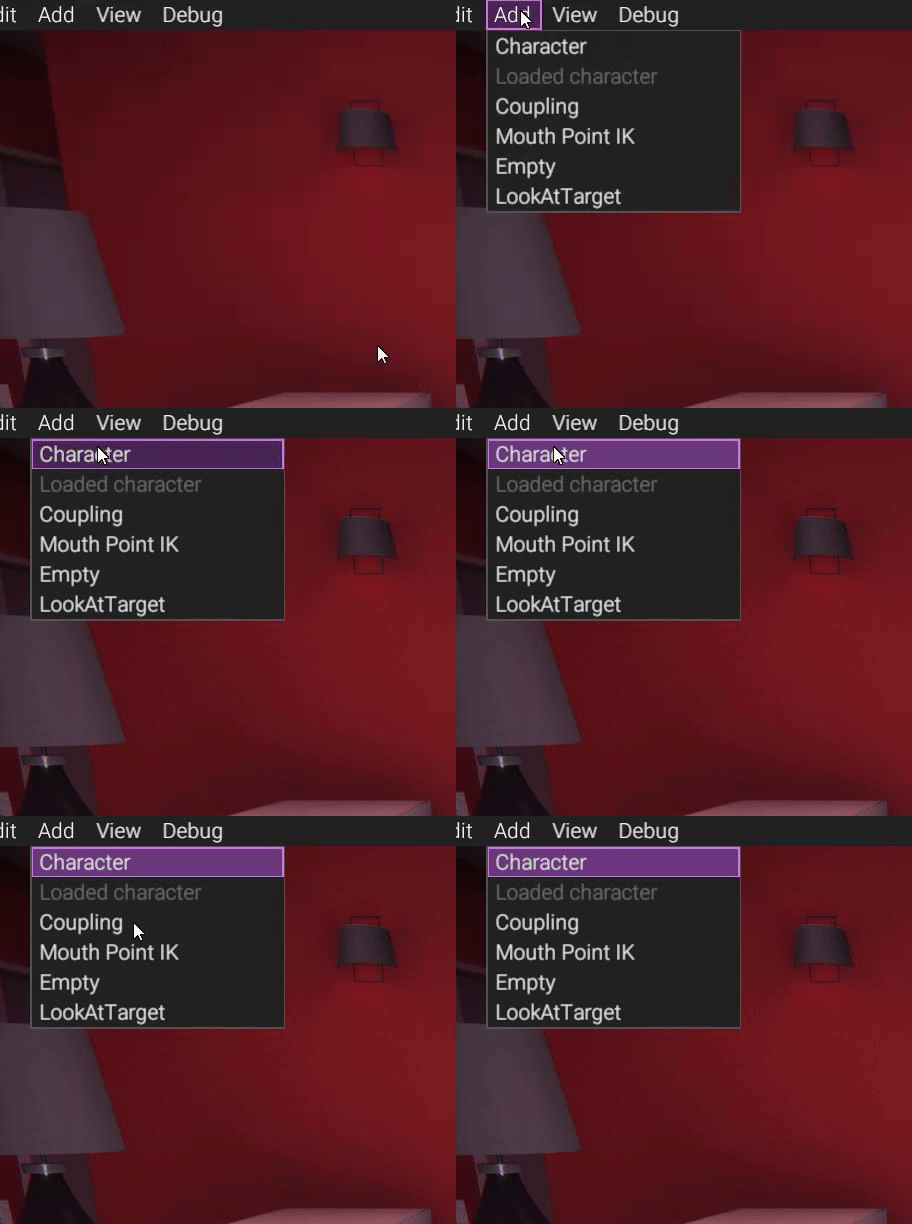
A new window will open, select a character (saved as exported for interactions).
Once the loading is done, click them anywhere to place them in the world after the loading.
¶ 3. Make characters do the thing
To make characters couple up, Add > Coupling
a new “Coupling” selection in the outliner will appear. Select it if not automatically selected, and designate the characters by expanding Targets.
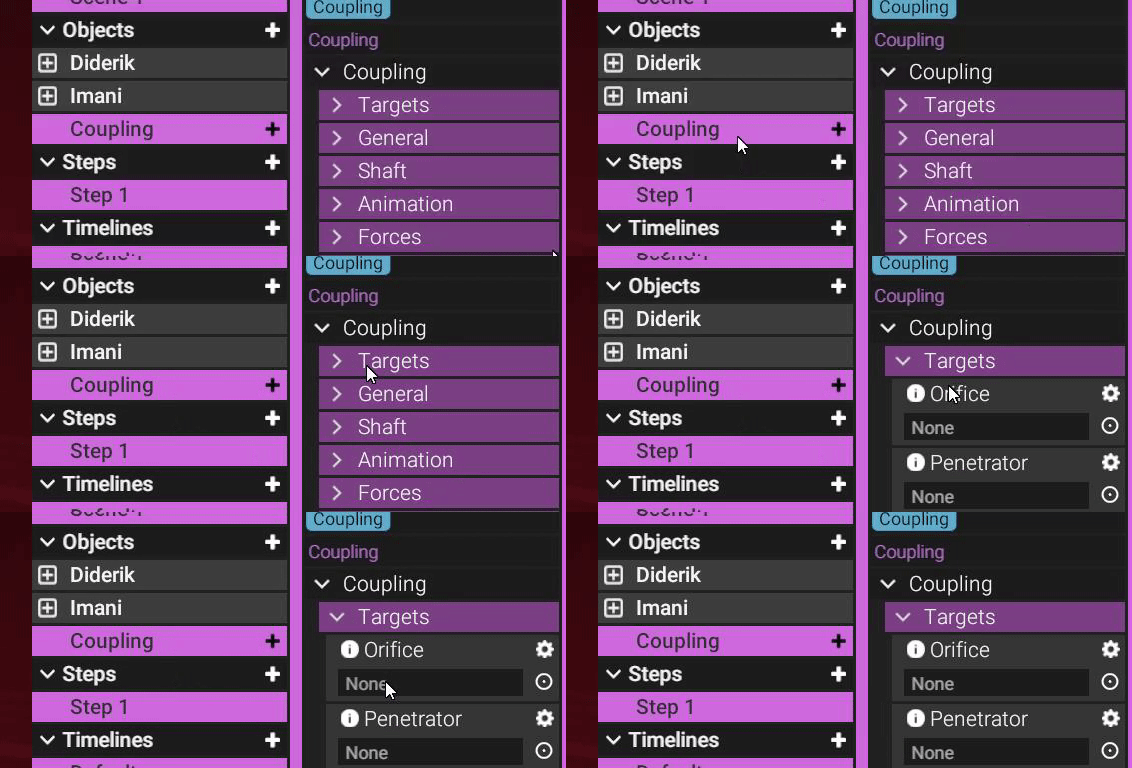
Orifice is the hole, penetrator is the dick.
The Coupling as selected will move the entirety of both characters if you need to move them.
This is also where you can do the procedural animation for the coupling
Clicking on the + icon in Coupling, you will grant sounds for it.
¶ 4. Tid bits to know: CAMERA
Press TAB to enter First Person Camera mode.
Hold RightMouseButton to look around.
While holding it, mouse wheel up or down to adjust movement sensitivity.
You move around the environment with W A S D (forward, Left, Back, Right)
Hold SHIFT for a quick Quadruple speed increase while it is held.
¶ 5. Tid bits to know: SELECTION
To quickly find the limbs, and elements that you are trying to target, you can select them via the Outliner and character dropdown.
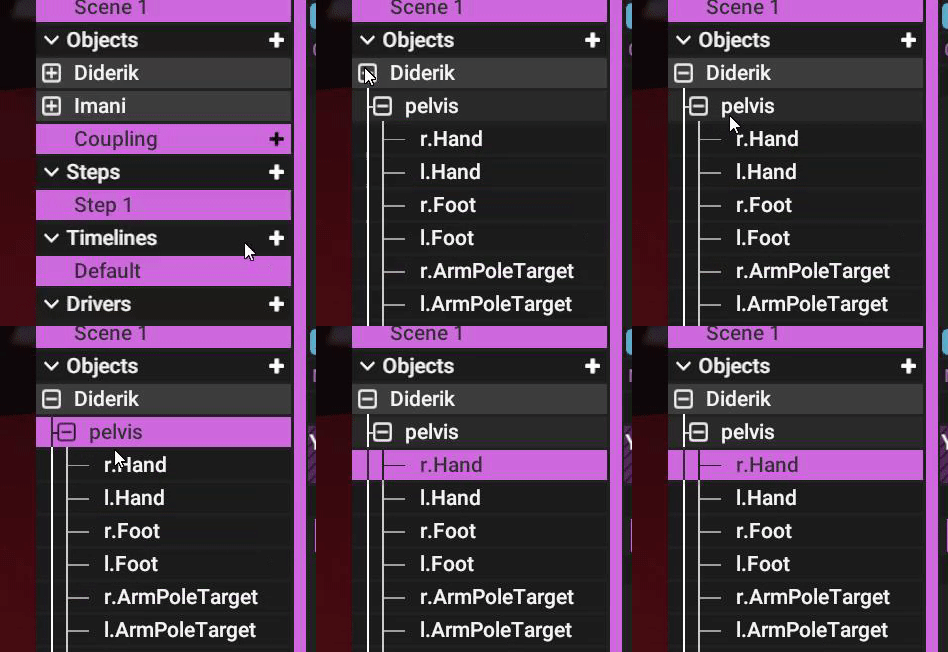
This may be easier than clicking the small nodes.
Also
Some things require that you click and drag objects from Outliner into Property options.

¶ 6. Tid bits to know: HANDS
Have a Hand node of a character selected, and CTRL+Click any surface on the environment or character to make the hand parent to it.
The fingers will dynamically do its best job to move with the surface.
Parented objects like this will not move on its own away from the object it is parented to.
Parented objects can still be manually moved away from the object it is parented to (This can be an important trait to use).
To unparent an object, LeftAlt+A while it is selected.
¶ 7. Tid bits to know: SHORTCUTS and OPTIONS
A quick list
F to focus on your selection
W to move, E to rotate eligible nodes
R to reset rotation
LeftAlt+R to Reset Node
Space to mirror an eligible node with another
Shift+H to hide nodes (Might require several inputs)
With no nodes selected
Ctrl+Click(hold) to drag physical objects (like tits, tail, dick, hair)
If you need to mute the app for whatever reason, go to Edit > Preferences and you should see the options in properties.
¶ 8. Tid bits to know: Scenes, Steps and Timelines
I will not go over every detail as of this quick guide but know this.
A scene holds steps and timelines. Steps hold timelines and drivers. Timelines are their own.
Steps feature a Default Timeline this is the timeline with no influence other than hosting untouched nodes.
Creating a new timeline, you can animated individual nodes on their own.
View keyframe timeline by clicking on View > Keyframe Editor
A timeline requires a change to a node for it to host the node within its timeline.
Timelines also feature Events by RightClicking on the Events → line of time and adding one.
These events can be step transition, or scene transition. Cum event, sound event, etc.
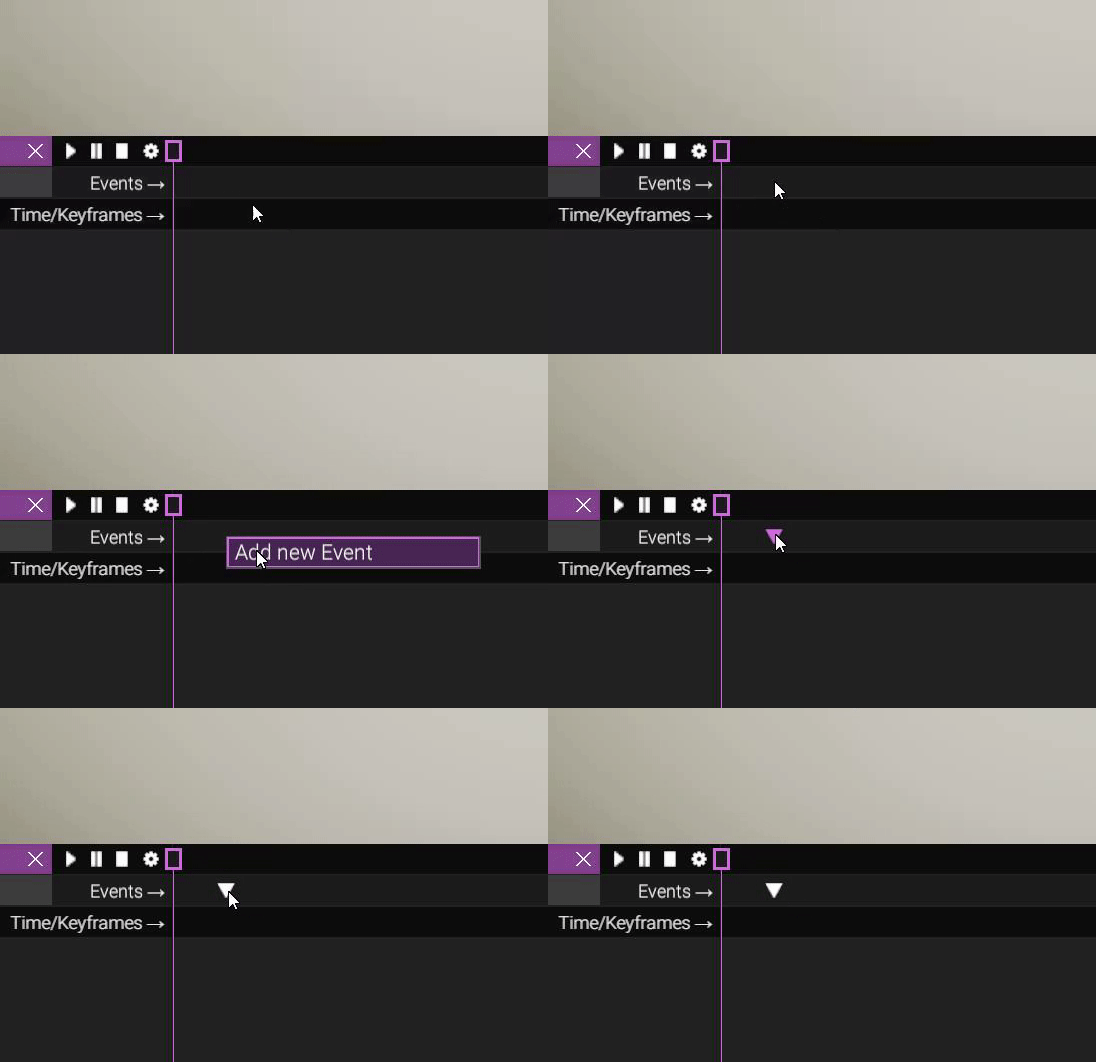
There is nothing that animates un-coupled characters to being coupled between steps or within a timeline. That requires a Scene Change.
¶ 9. Tid bits to know: Importing physical objects to your character
A model and the armature selected should be exported out of blender as a .glb file
When imported into FVNE, find the .obj and .glb clasification on the lower right of the window that opens when importing a model.
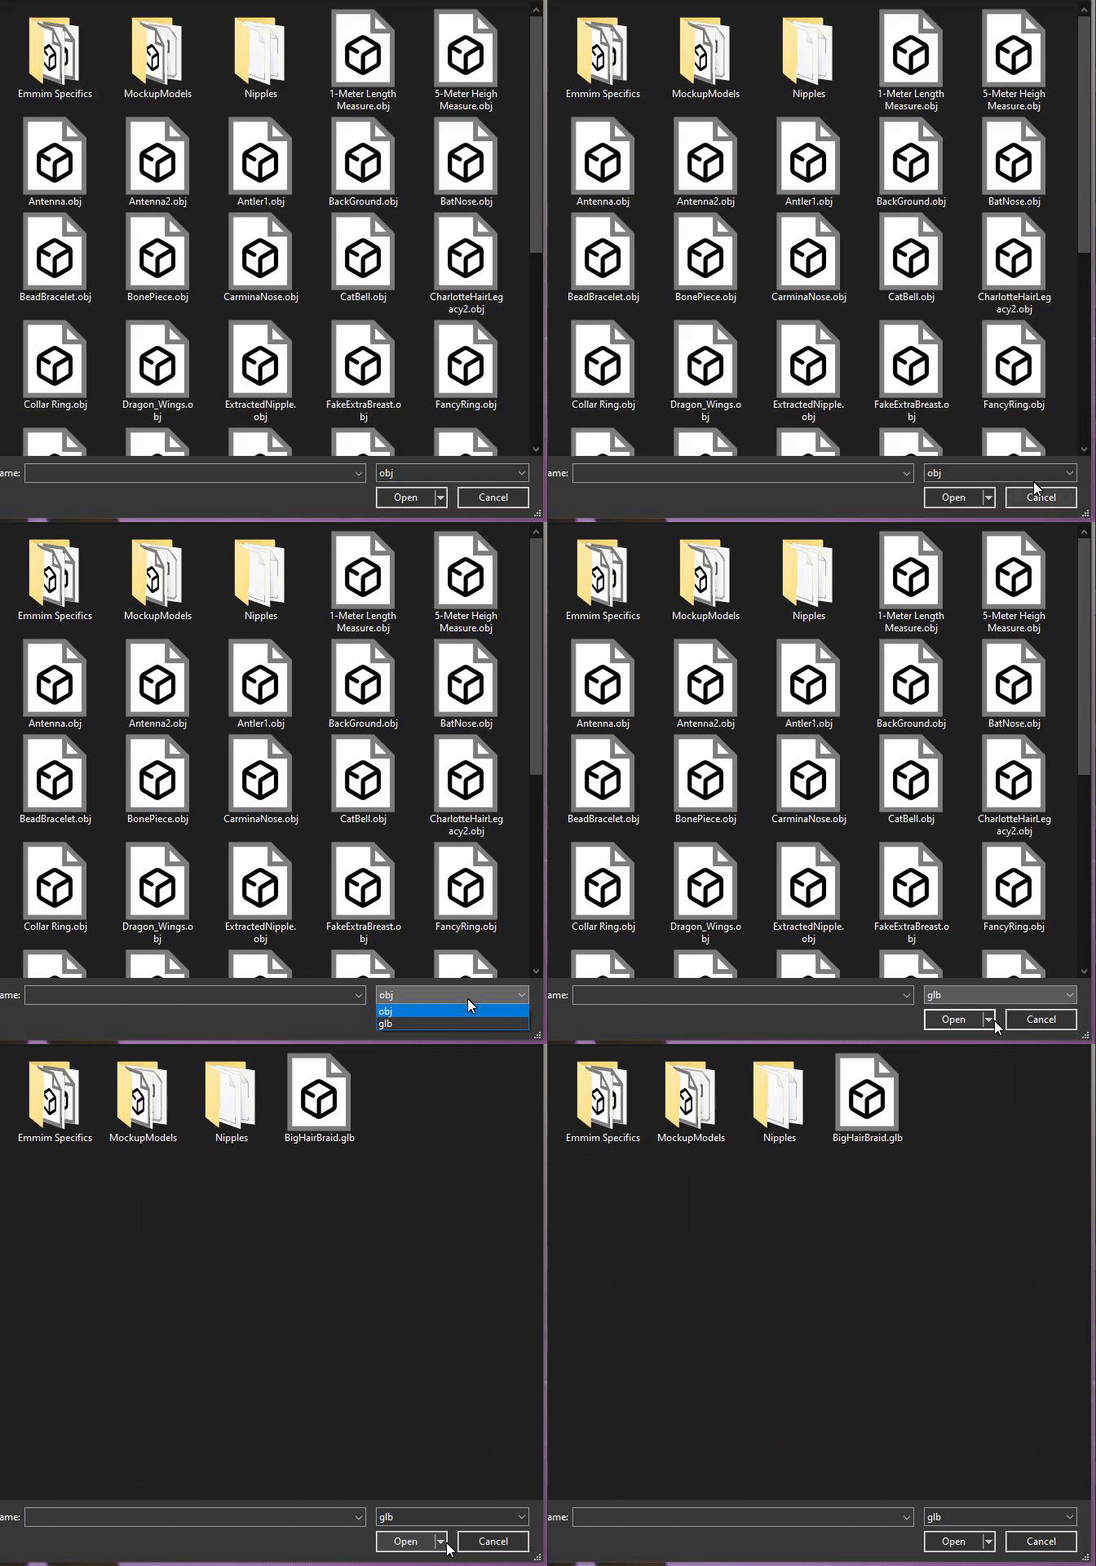
¶ 10. Final Words of Advice
Experiment with many different options, and figure out what works and does not work in interactions.
There are a ton of options and settings to play with so figure out your favourites and style.
I suggest you get familiar with the Keyframe viewer and mess with timelines in small doses
Do not do everything within a single timeline, only make it do one or two things at a time.
For instance, a Timeline to only host the events for cum and scene/step transitions.
Another timeline (set as property) to be the basis of a driver. Etc.
Stick to just doing simple animations with default settings, and thats that. Afterwards, you can get more comfortable with more options to better perfect your actions.