¶ Pose Mode
Pose mode is a great way to admire your character, but also to test them around to see if they are in good size.
- The upper left menu bar has Pose Mode, Click it.
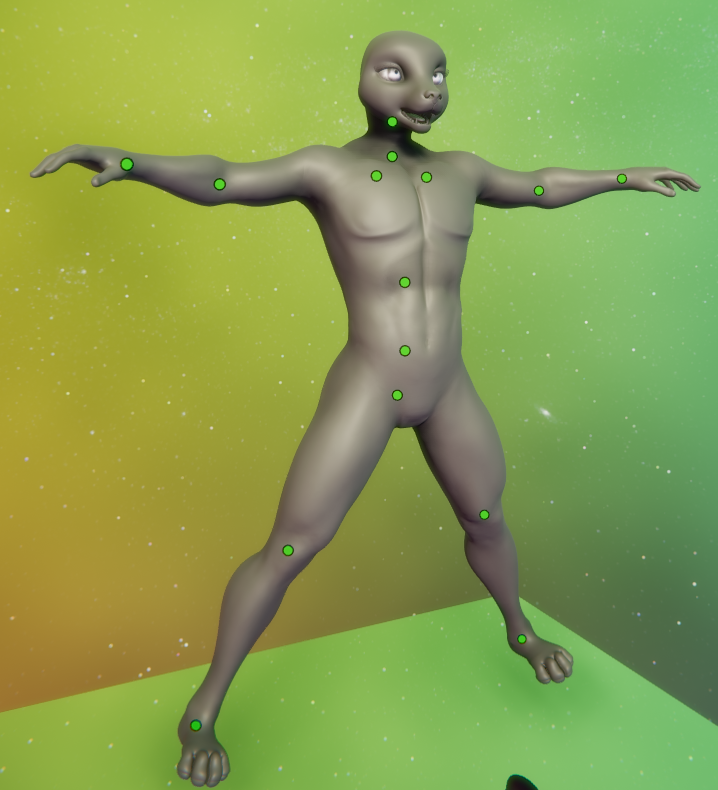
You will notice that you have changed modes where almost everything has new options.
The Outliner and properties, a new Pose Tool window, and the upper left menu bar has changed.
As well as new dots around your character.
You can experiment around with whatever you want to familiarize yourself with this mode.
- You can change environments using the upper left menu in Editing mode.
To start off, the most important of options in pose mode is probably the Outliner.

- Directly Clicking into "My character" (Otherwise your characters name) will reveal all the Expressions list on the Properties.
Certain heads come with pre-built expressions. Any Custom Offset with expressions will also appear here. - Expanding the "My Character" section will reveal Garments, Parts and the ability to find each node through this menu.
Garments can be revealed or hidden, change their modes from here if they are not "part of the body".
Parts can also be disabled or not, depending on if each parts "Exposed" checkmark has been checked.
- The Pose Library if expanded reveals a list of poses (Only one by default).
You can add new poses (Copying the one selected) by clicking the + icon.
Any movement that you do to the character will apply to the currently selected pose in the pose library, highlighted in Bold.
The next thing to look into are the Nodes on your character.

Each node represents a joint part of the body. You can click on them (Or select them via Character > Pelvis >... ) and move or rotate them around.
- The center of the character is the Pelvis/Hips. This node allows you to move the entirety of the character, given that the arms and legs are reset.
- To Move or Rotate a part of the character, click on a Node. You can use the Pose Tool window and familiarize yourself with the shortcuts.
You can also select multiple nodes by clicking to hold and drag a box over them. Or, by holding CTRL and clicking multiple nodes to have those selected at the same time.
Shortcut Guide:
W to toggle Move axis mode.
3 arrows that will help you navigate and move the node around. You can use the arrows or the box near the center to move the node.
E to toggle Rotate axis mode.
A wheel with 3 Lines. You can finely use the lines to precisely rotate, the outer white line to rotate based on your view, or the empty space in-between to rotate freely
Space to mirror one node to from the selected node. The mirroring is according to the position of the pelvis.
R to Reset the node/joint to its most default.
D to deactivate the node, and have it reset as "without position". Elbows, hands, knees and feet stick to their position unless deactivated. If you want to move the entirety of the character, it is usually best to deactivate the limb nodes first.
X to toggle Transformed Space.
This will have the Axis arrows and lines follow the objects orientation rather than a spacial orientation. This is great for moving the fingers.
F to direct your camera to the selected node. Or to the pelvis by default.
- Generally, you cannot move the head and torso areas. You can only rotate them.
The limbs can be moved.
The elbows and knees point towards the node, so those can only be moved.
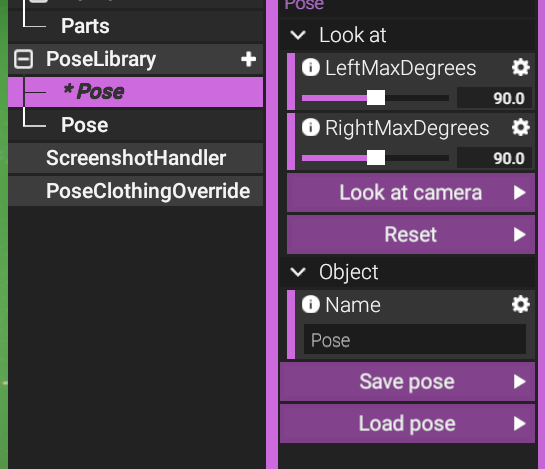
Within a pose (Pose Library > pose) you can edit where the character is looking, and give the pose a name for clarity.

- Look at camera option forces the eyes to look at wherever you are with your view at the point when you clicked this option. It might look like it isnt looking straight at you, perhaps a bit over you, this could be because of the model itself. Simply adjust yourself slightly below and then click on this option to adjust the eyes. Both eyes will create a line to exactly where the camera is. Moving the character around after will have the eyes still try to follow where you set the "Look at camera" point.
What this means, is you can make a character cross eyed if you position the camera very close, or have the character look into a direction more realistically if further away. - Reset resets the eyes to look straight without any point to look at.
- Left and Right MaxDegrees sliders helps create a limitation to how far the eyes should be moving. This is for occasions when the eyes look too far into the head.
- You can also name the pose.
Important note: Disabled or enabled parts, revealed or hidden garments, expressions and eye look are all saved for each pose.
So feel free to do as much with one pose as you need.
¶ Finger Posing
A simple way to pose fingers is to use the Toggle Transform Space (X).

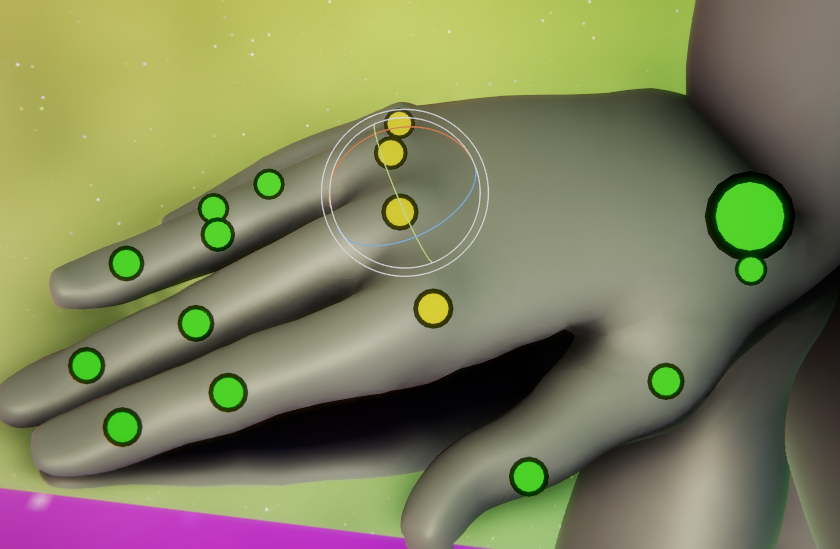
To pose fingers, select the Hand. A bunch more nodes for each finger and their joint will appear.
- Select a node (Or multiple nodes) and activate Transform Space (X hotkey). Other wise the lines will point towards a spacial orientation rather than the fingers orientation.
- Rotate them in the direction you think is good.
- As an example, If you need to make a fist, select all the finger nodes and their joint (Except for the thumb), and in one fell swoop you can rotate all the fingers to curl in. You can make minor adjustments later.
- To mirror the fingers with the other hand. Select the entire hand and the finger and thumb nodes. And then Mirror (space hotkey) them Multiple times as it might not mirror exactly on the first press.
¶ Screenshot Handling

Taking a screenshot is an important step to uploading a character as at least a Thumbnail is required for the upload to complete.
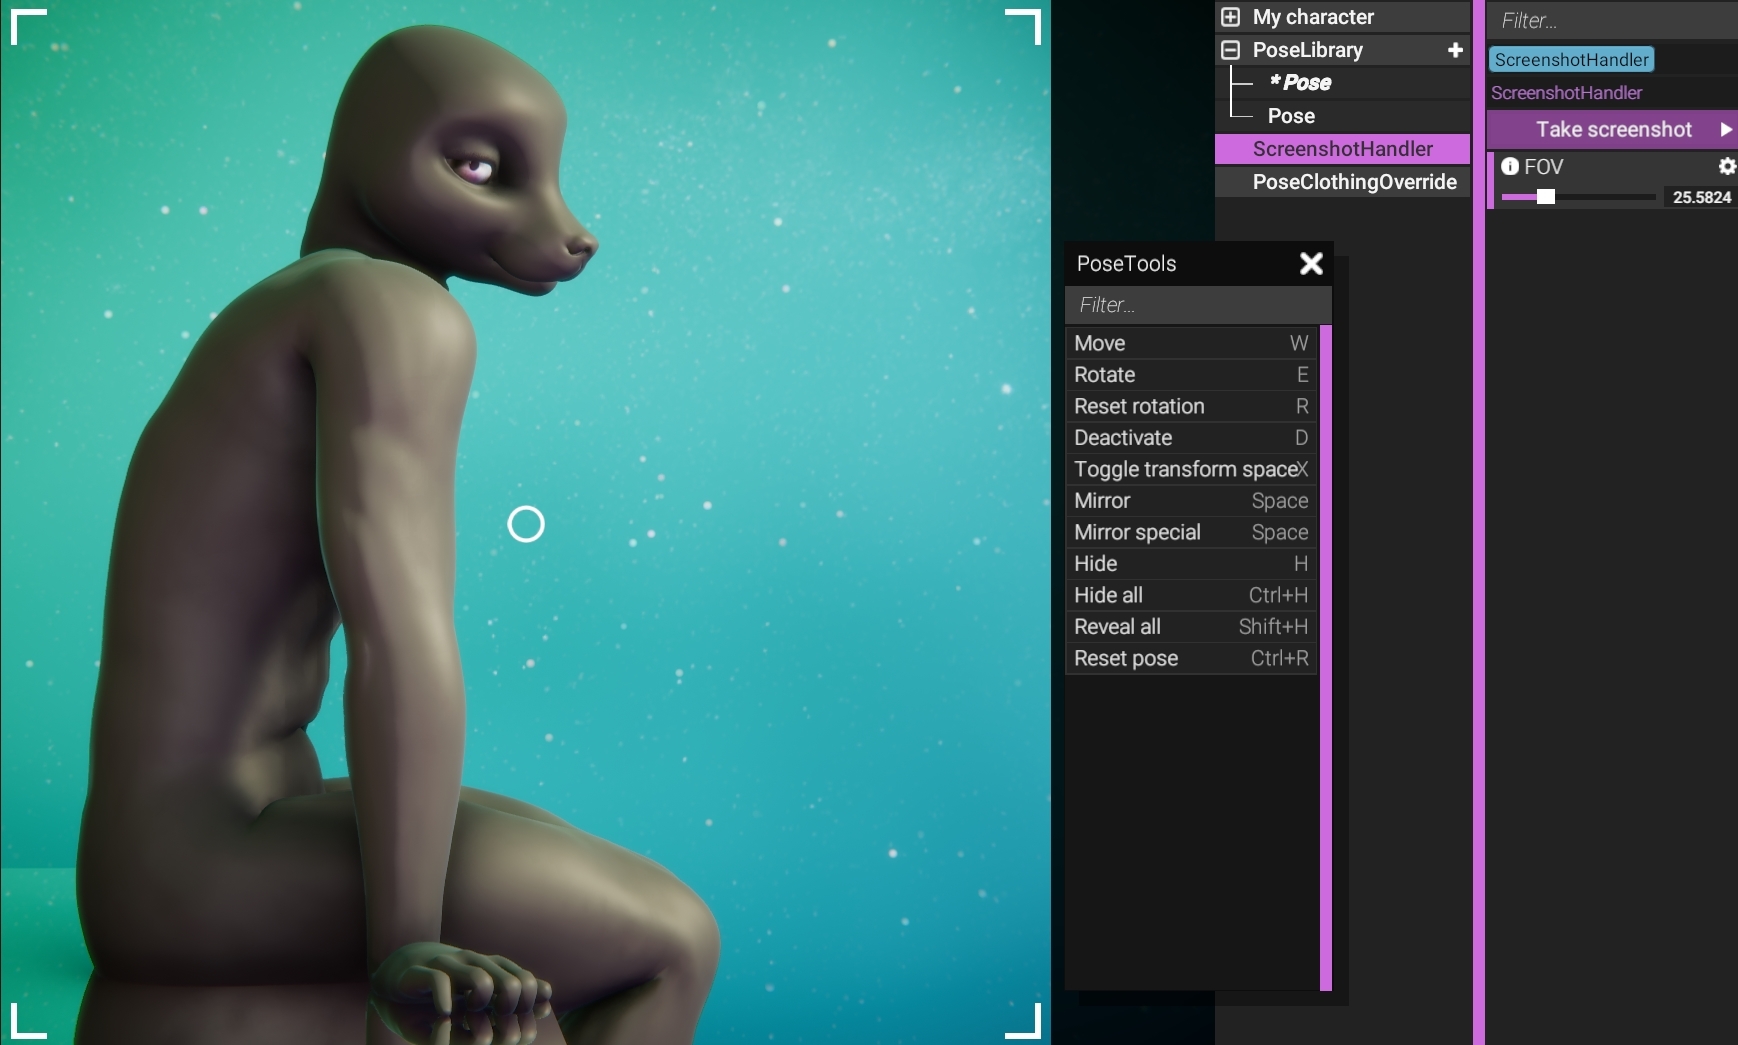
- To start taking a screenshot, click on ScreenshotHandler on the outliner.
- Move the PoseTools window away. You can remove it as well. You can bring it back in the upper menu bar View > Pose Tools.
- The camera is now set to a square (1:1) image ratio as that is the purposes of which the Cloud App is using.
- Your view is also the camera view.
- In the Properties, you can click to take picture.
- Below it, you can adjust the FOV. We strongly recommend you take mileage out of low FOV as it flattens an image to usually look nicer.
Lowering or Rising the FOV might require you moving further in or away from the subject with the camera. - When you have taken a picture, you can preview it by clicking the new screenshot, likely labeled something akin to "Screenshot 17" by default. You can rename the screenshot if you so wish. Hover your mouse of the checkered square to preview it. You can also extract it and save it to you PC.
- You can move the screenshots up or down (Right Click one for options), this is important as the Top Screenshot will appear as the thumbnail.
When the character is uploaded, only the first 5 screenshots (Thumbnail + 4 other screenshots) on the list from top to bottom will appear in the Cloud.
Tip: Remember your shortcuts from the very beginning? Press L to toggle on or off the Camera Light. This is great for deciding on the lighting with your screenshots.
Tip: It is very useful to use the different environments to measure out how large the character is with pose mode.
Tip: You can export the character as an OBJ file with the pose you gave it using the upper left menu bar.
Next page to [Publishing to the Cloud]