¶ Selecting a Body, Hand, Feet.

In any Outliner such as: Body > or Head > or Hands > or Feet >, The first selection such as: Body type, Head Model, Hand Model, Feet Model let you choose unique preset models for the character.
- Body > Body Type
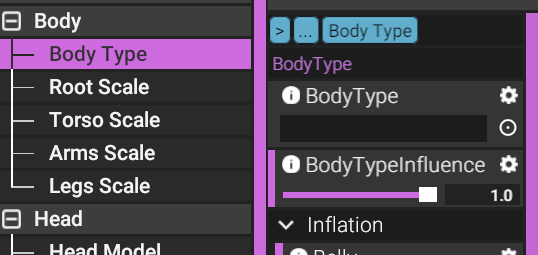
Within Body > Body Type, You can click on the empty BodyType model in properties side, a new window pops up to let you make a decision.
The properties within Body Type also provides sliders such as the Body Type Influence that will tell the app how much of the body you want it to blend with the default body. If you want a muscular body, you would go with bt_m_Muscular, but not too muscular, so you pull the Body Type Influence slider down enough to what you want.
There are sliders for different Inflation. Usually, the inflation slider comes with Belly, Breasts, AssHips sliders. These sliders simply inflate the model in those areas. Try and see if these bubble the model in a desired way. Although, do note that most if not all body parts have physics to them. Breasts may not look desirable in creator mode, but in pose mode, the physics will drop them, simulating approximately how they would behave.
Tweakables sliders usually come in the form of Breastlift and GluteCrease sliders.
- Head > Head Model and Face Type
The Head outliner comes with many options. Eyes, Eyelashes and Tongue will be covered here [Eyes and Eyelashes] and [Tongue options]. For now, we focus on Face Type, Head Scale and Neck Scale.
Choose a Head Model, Certain Head Models also have unique features such as long necks with extra nodes to pose them around. And some come with pre-modelled teeth while others are gummed. See [Appendages - Fluff] [Appendages - Model] to set teeth models in the mouth of a gummed head model. Depending on what head you choose, there may be extra Tweakables within Face Type for you to edit.
Face Type has you choose a muscular or feminine model of the said Head Model, and a slider in order to blend it to its default shape. Face Type also comes with Tweakables depending on the head model. The sliders under Tweakables will let you change around the face in detail. Try not to go overboard with them! If you want to go in very high detail over a face, check the advanced [Custom Offset] section.
- Hands > Hand Model and Feet > Feet Model
There is nothing extra within these models that has not been mentioned, unless there is a model with special rules. You will find Different hands and feet that shape differently, such as 4 fingered hands and Digitigrade 3 toed legs. Choose what you deem appropriate!
¶ Scaling the Body and Limbs
It is recommended that you choose your desired Head model, Hands model, Feet model and Privates before deciding to scale anything.
In any outliner such as: Body > or Head > or Hands > or Feet >
There are options to edit
- Body > Root Scale
Simply put, Body > Root Scale has you changing the entire characters size exactly. Up to 1.5 or down to 0.5. However, parts, masks and most other external additions will not scale up with the body. It is recommended that you have set the root scale properly before you go into adding anything else! (Or else you will be making many annoying adjustments and fixes)
- Body > Torso Scale (Comes with several parts over the torso to scale.)
- Body > Arm Scale (Has 3 scales to edit and a Slider for spacing)
- Body > Leg Scale (Also has 3 scales to edit and a Slider for spacing)
Scaling is essentially shaping the character within the constraints of the characters bones.
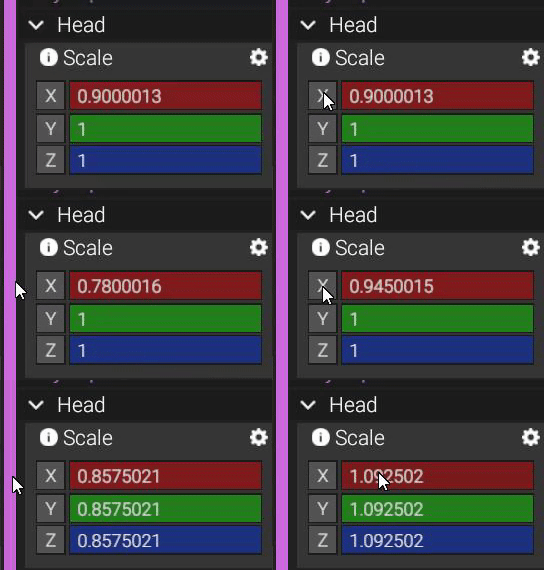
Each part has X, Y and Z directions to scale each body part, up to 1.5 or down to 0.5.
You can type the numbers in directly, or Click and Drag the X, Y, Z images besides the number to scale it directly. Hold Shift+Click and Drag to scale all 3 axis in formation.

It is recommended that you choose a model for each available limb before scaling because different models shape different from scaling.
As always, you are able to re-adjust the scaling when you do change models for any reason.
There are also various other scales to remember:
- Head > Head Scale and Neck Scale
- Hands > Hand scale and Finger Scale
- Feet > Feet Scale and Toe Scale
- Privates > Ass Scale
Tip: You can combine some of the inflation and scaling sliders for greater effect. As an example: On a normal neck model, you can combine Upper chest from the Torso Scale with the Neck scale to make the neck even longer.
Next Page [Parts and adding tails]